- - Updated at
- Tiziano B.
- Approfondimenti
- 2190 views
Today we’re launching the “How It’s Made” series—a deep-dive for all DIY enthusiasts and for anyone who wants to better understand every component of a kitchen hood. Whether it’s out of personal curiosity or because you’d like to fix parts yourself, this section is for you.
Before we begin, a quick introduction: I’m Tiziano, the technician behind Filtro Cappa, and I’ve been working with kitchen hoods for over 20 years, specializing in technical support and spare parts sales. Over the years, I’ve been contacted by hundreds of people with a wide variety of issues related to their kitchen hoods.
All the content on this website has been personally written by me, to provide real support for those of you looking for reliable, hands-on information, written by someone with direct experience in the field.
This first technical article focuses on the hood motor and covers:
Types of hood motors, with their pros and cons
Common motor problems and how to fix them
What NOT to do with your motor
Keep reading!
Motor Components
Before understanding how the motor works, it’s important to first look at its individual parts. This will help you better grasp what actually happens when you press the power button. Here are all the components that make up a kitchen hood motor:
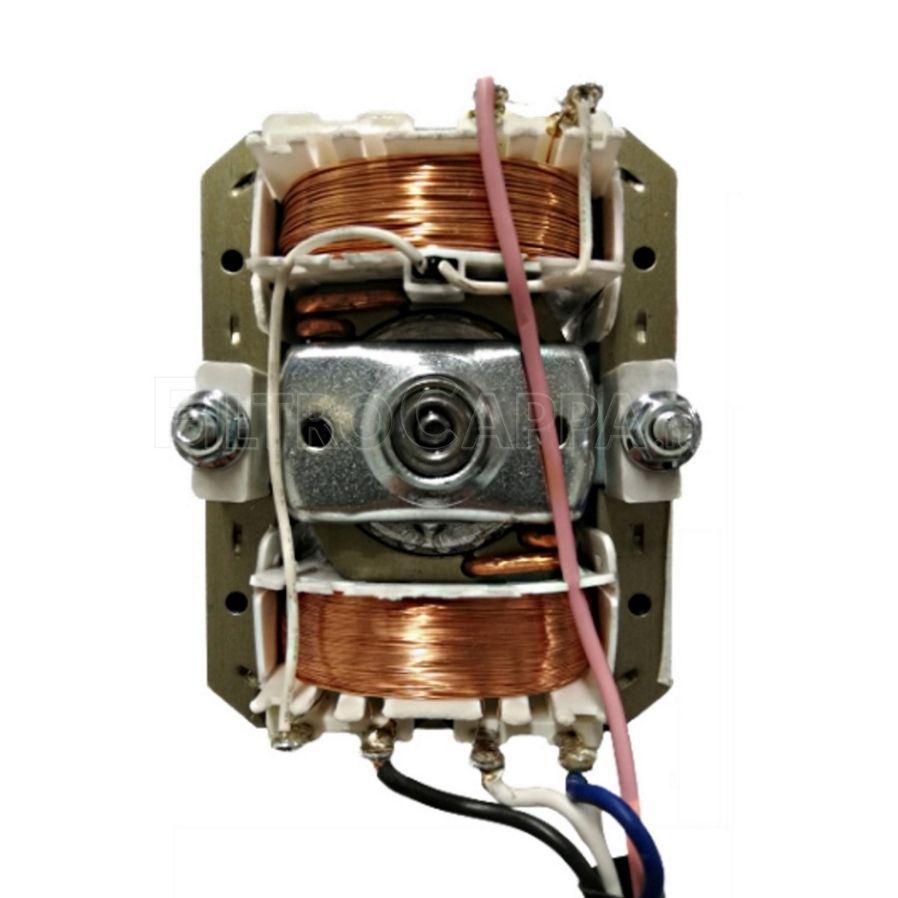
1) Stator (stator windings)
2) Rotor (squirrel cage type)
This is the rotating part of the motor, mounted on the shaft. It’s made with aluminum bars cast inside a stack of ferromagnetic laminations.
The rotor is not directly powered (it’s a passive component), but it plays a critical role in motor dynamics. It spins as a result of the magnetic field produced by the stator.
3) Start or Run Capacitor
This is a key component in single-phase asynchronous motors. It serves to shift the phase of the current in the starting winding and generate the initial starting torque.
Without this capacitor - or if it's faulty - the motor won’t start.
4) Terminal Block
This is where the power supply wires connect to the motor. The connection can be soldered, fast-on, or screw terminals.
5) Thermal Protection (Thermostat or PTC)
A built-in device that protects the motor from overheating. If the motor overheats, this component will block operation until it cools down.
6) Internal Wiring and Cables
These are the various wires connecting the windings to the terminal block and capacitor. They must be heat-resistant (Class F or higher) and shielded where necessary. In some cases, they’re housed in protective sleeves made of silicone or fiberglass.
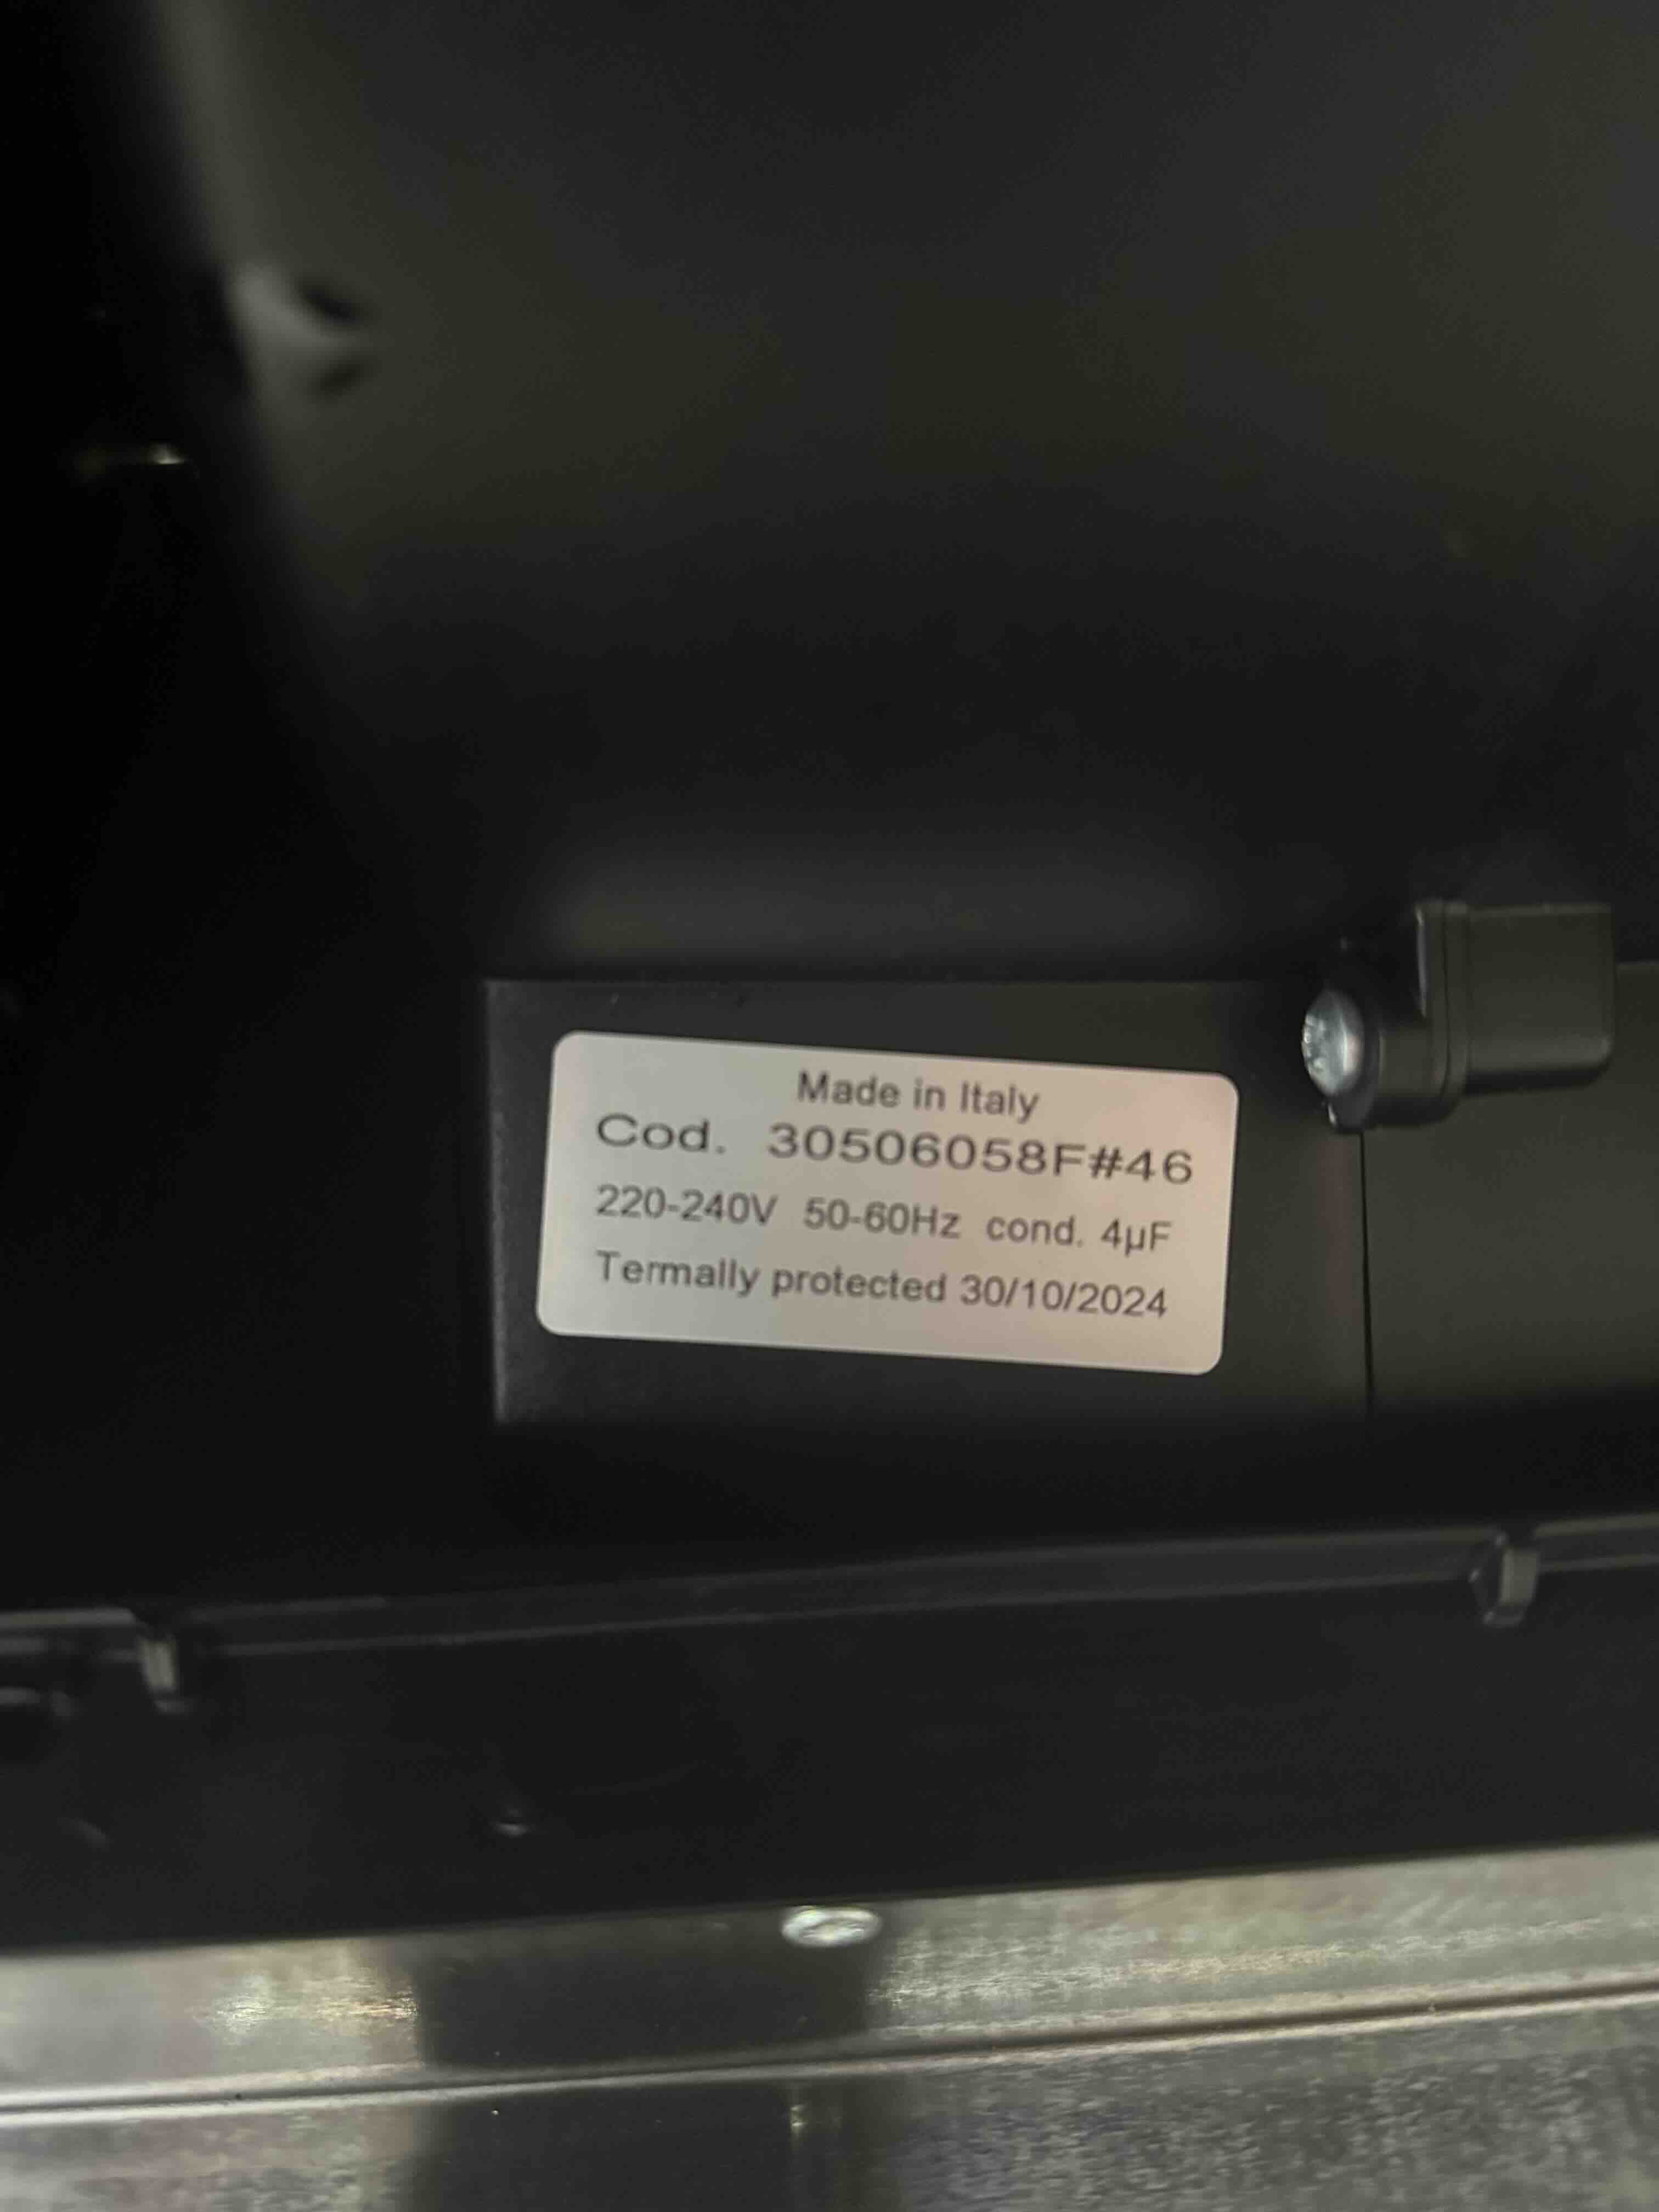
7) Technical Data Label (Motor Nameplate)
This isn’t a functional part of the motor, but it’s essential for troubleshooting or replacement.
The information shown on the label may vary depending on the manufacturer or, in some cases, may be missing.
Typically, you will find engine identification data such as:
Rated voltage (e.g. 230V)
Frequency (e.g. 50Hz)
Power (e.g. 100W)
Capacitor rating (e.g. 3.5 µF)
Insulation class
Now that we’ve seen all the key elements you might encounter in a hood motor, let’s take a look at how it actually works.

How the Motor Works
As you probably know, the motor in a kitchen hood is the core component that powers the entire extraction system. Without it, the hood simply wouldn’t function.
The motor used in hoods is electric and is activated as soon as the hood is turned on.
Specifically, the motor begins to rotate due to an internal magnetic field. In most cases, it’s an asynchronous motor, typically a three-phase motor (with three electrical phases offset by 120°, common in industrial systems with 400V power supply), but adapted to run on standard 230V single-phase domestic power.
This adaptation is made possible by a phase-shift capacitor, which creates an artificial phase and generates a secondary magnetic field, allowing the rotor to start rotating.
| Motor type | Power supply | Common use | Advantages | Disadvantages |
| Three-phase | 3 phases (400V) | Industrial systems | High efficiency, strong torque | Requires three-phase power supply |
| Single-phase (with capacitor) | 230V (phase + neutral) | Domestic households | Compatible with home installations | Slightly lower efficiency, startup depends on capacitor |
→ If you disassemble your kitchen hood and take a look at the motor, you’ll usually see two or three wires coming out of the motor casing. If there’s a capacitor connected, you’re almost certainly looking at a single-phase asynchronous motor with a start or run capacitor.
The rotation generated by the motor is transferred directly to the impeller (also called the fan or rotor), which creates the airflow.
I won’t go further into this topic now, as a dedicated article about the impeller will follow soon.
What’s important to understand is that the motor runs continuously to maintain constant pressure and airflow.
The greater the pressure losses (caused by obstacles in the air path or clogged filters), the harder the motor has to work to compensate increasing energy consumption.
Some kitchen hoods use modern brushless motors (with capacitors), which consume less electricity and produce less noise.
Tipi di motore, in poche parole
| Tipo | Alimentazione | Vantaggi | Limiti | Applicazioni tipiche |
| AC a gabbia d’ec ardine (PSC) | 220-240 V ~ | Costo basso | Power factor medio-basso | Cappe economiche |
| AC a multi-velocità con condensatore | 220-240 V ~ | Modulazione semplice | Minor coppia allo spunto | Cappe domestiche standard |
| Brushless DC (BLDC) | 24-48 V cc + inverter | Silenzioso, alto rendimento | Elettronica più complessa | Cappe premium, filtranti |
| EC (electronically commutated) | 230 V ~ + elettronica integrata | Efficienza top, controllo fine | Prezzo più alto | Ristorazione, cappe smart |
Motor Diagnostics: The Most Common Issues
Now that we’ve seen how a hood motor works technically, let’s look at the most frequent problems associated with this component and what you can do to repair your kitchen hood:
1) The Motor Doesn’t Start
When you turn on the hood, the lights come on but the motor doesn’t react. No noise, no vibration.
Possible causes:
Faulty start capacitor → the artificial phase required for startup isn’t generated
Defective switch/control board → the motor doesn’t receive power
Thermal protection triggered → the motor has overheated and shut down
Broken wiring → disconnected or damaged wires, especially at the terminal block
Burned-out motor → shorted or open windings
2) The Motor Starts but Then Stops
The fan starts spinning for 1–2 seconds, then stops suddenly or shuts off by itself.
Possible causes:
Degraded capacitor → provides insufficient torque, motor can’t complete startup
Damaged windings → heat buildup causes thermal shutdown
Active thermal protection (PTC or bimetal) triggers as a safety measure
Blocked impeller → foreign object or solidified grease prevents rotation
Faulty electronic board → unstable voltage output
3) The Motor Runs but Airflow Is Weak
The hood powers on and the fan turns, but the air extraction is poor or ineffective.
Possible causes:
Clogged or greasy filters → restrict airflow (both metal and carbon filters)
Obstructed ducts → insect nests, hardened grease, overly sharp bends, or crushed sections
Stuck non-return valve → flaps don’t open fully, blocking airflow
Dirty or deformed impeller → reduces static pressure, limiting airflow
Fan spinning in reverse (rare, but possible) → incorrect installation
4) Unusual Noise or Vibrations
The hood runs normally, but makes metallic noises, loud vibrations, or irregular humming sounds.
Possible causes:
Unbalanced impeller or misaligned with the motor shaft
Loose motor supports → the whole unit vibrates against the structure
Worn motor bearings → cyclic, metallic or squealing noise
Foreign object near the fan → tapping or bumping sounds during rotation
Fan blade contact with internal hood parts
5) Burning Smell from the Motor
You notice a strong smell of burning plastic or paint while the hood is running sometimes followed by smoke or an unexpected shutdown.
Possible causes:
Motor windings shorted → insulation overheats and starts to melt
Shorted capacitor → produces a pungent smell, may appear swollen
Overload from blocked ducts or filters → the motor overheats from working too hard for too long
Not sure where the problem is coming from? Contact me!
Once you describe the symptoms, I’ll help you identify the cause and recommend the most effective solution along with the best spare parts to get your hood back in top shape.
Safety First: What You Should NEVER Do
Working on a kitchen hood requires care, technical knowledge, and strict respect for basic electrical and mechanical safety rules to avoid unpleasant and dangerous domestic accidents.
Here’s a list of actions you should absolutely avoid when handling the motor or any electrical components of your hood:
Never work on the hood while it's powered → Turning it off is not enough! Always unplug the hood completely before touching any internal parts.
Remember: 230V power is potentially lethal.Do not touch the motor right after switching it off → The motor can reach high temperatures during operation. Touching it with bare hands may cause burns.
Wait at least 10–15 minutes before working on it.Never replace parts with makeshift or incompatible components → Don’t use parts from other appliances, different motor types, or capacitors with the wrong ratings. Always use original or 100% compatible spare parts. On Filtro Cappa, product pages clearly list all compatible models and brands.
Do not touch the electronic board unless you’re an expert → The control board contains live components even after the hood is turned off, like filter capacitors. If you’re not sure what you’re doing don’t touch it. Call a technician instead.
Never work with wet hands → Electricity and moisture don’t mix. Make sure your hands are dry and that you’re working in a dry, safe environment.
Do not leave exposed or disconnected wires → Bare wires or ones loosely wrapped in tape are very dangerous and may cause electric shocks! Always use properly insulated wires and reconnect them correctly and securely.
Don’t use the wrong tools → Use certified screwdrivers and electrical testing tools to avoid the risk of accidents at home.
Never modify or extend wires → Avoid splicing or extending wires between the motor, capacitor, or circuit board. These modifications can cause sparks, short circuits, damage to the control board, or in the worst cases, fire.


